
Roof Repair NJ › Roof Leak Repair
Leak detection & repair · All 21 NJ counties
Roof Leak Repair in NJ: We Trace the Water to Its Source and Fix It Right
Roof Repair SNJ finds and fixes roof leaks on New Jersey homes and buildings in all 21 counties. We trace the water from the stain back to where it actually gets in, repair or re-flash that spot, and give you a free inspection with photos and a written itemized quote. Active leak? Our 24/7 emergency service handles requests around the clock, so request a free roof leak inspection any time.
- Attic-to-roof tracing finds the real entry point
- Free inspection with photos of the source
- Written itemized quote before any work
Free inspection, written quote
Photos of every problem we find and an itemized price before any work. 24/7 emergency service.
Roof Repair SNJ
Serving all 21 New Jersey counties
Free inspection
Roof, attic and gutters checked at no cost.
Insured
Liability and workers’ comp; certificate on request.
Written quotes
Itemized price in writing before any work.
Photo-documented
Every problem photographed, before and after.
What you’ll notice
What Are the Signs You Need Roof Leak Repair in NJ?
A brown ring on the ceiling, a drip from a light fixture, peeling paint near a chimney or damp attic insulation all point to a roof leak that needs tracing. Some signs only show up in one kind of NJ weather, so note when each one appears. That timing is often the best clue to the source.
Ceiling stain with a dark ring
A tan or brown ring that grows after each rain means water is reaching drywall and drying again. The ring marks where water pooled, which is often several feet downhill from where it entered the roof. Mark the edge with a pencil and date it so you can tell if it spreads.
Drips from a light or smoke detector
Water follows wires and fixture boxes because they are the first hole it finds in the ceiling. A drip from a recessed light, fan or smoke detector is a leak plus an electrical hazard. Shut off that circuit at the panel and send us a request online before you touch the fixture.
Leaks only in wind-driven rain
If the ceiling stays dry in steady rain but drips during a nor’easter or a tropical remnant, wind is pushing water sideways under flashing, through a ridge vent or past siding at a sidewall. Write down the storm’s wind direction. It tells us which side of the roof to test first.
Stains that appear after a thaw
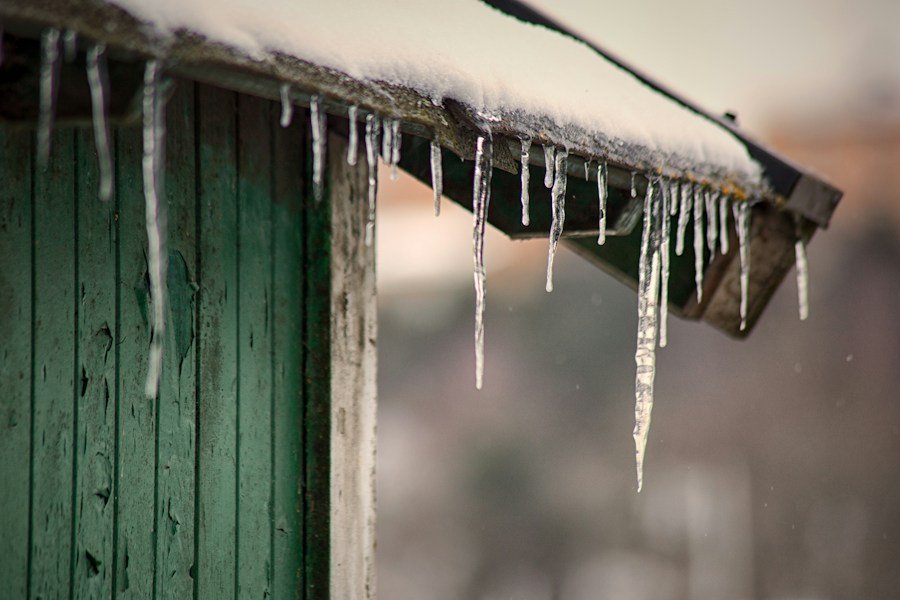
Water that shows up on a sunny day after snow, usually on an outside wall or near the eaves, points to an ice dam. Melted snow backs up behind ice at the gutter line and runs under the shingles. This is common in Sussex, Warren, Morris, Passaic and Hunterdon counties.
Wet attic insulation or dark rafters
Matted, damp insulation, black streaks on rafters or rusty nail tips in the attic show water has been getting in for a while. Rusty, frosted nail tips on a cold morning can also mean condensation, which we rule in or out before anyone sells you a roof repair.
Bubbling paint near a chimney or wall
Blistered paint, loose wallpaper or soft drywall on a wall next to a chimney, dormer or second-story sidewall usually means failed step or counter flashing. Water runs down behind the siding or masonry and shows up a floor below, sometimes in a closet or behind a bookcase.
Musty smell or mold spots
A damp, earthy smell in an upstairs room or closet, or small gray-black spots on a ceiling corner, means moisture has stayed long enough for mold to start. That usually takes a slow leak repeated over many storms. It needs the source fixed and the wet material dried or removed.
Clues outside: boots, granules, nails
From the ground, look for a cracked rubber collar around a plumbing vent, a shingle bump with a nail head showing, lifted shingles near the ridge or granules piling at downspouts. Each one is a likely entry point. Binoculars work fine. Stay off a wet roof.
Why it happens in NJ
What Causes Roof Leaks in New Jersey Homes?
Most NJ roof leaks start at a detail where the roof is cut or meets something: pipe boots, step and counter flashing, chimneys, skylights and valleys. New Jersey’s freeze-thaw winters, nor’easters, summer heat and shore wind speed up how fast those details fail.
Cracked pipe boots and vent flashing
The rubber collar that seals a plumbing vent pipe dries out and splits from years of NJ summer heat and winter cold. Water then runs down the pipe into the attic, and the stain often lands in a bathroom ceiling or a hall below. Plastic and rubber boots commonly crack long before the shingles around them wear out, which makes this one of the most frequent leaks we see.
Step and counter flashing at walls and dormers
Where a roof meets a wall, each shingle course needs its own L-shaped piece of step flashing, with counter flashing or siding lapped over it. On Cape Cods, split-levels and colonials with dormers, these joints are often face-nailed, caulked or missing pieces from an earlier repair. Wind-driven rain gets behind them and shows up on the wall below.
Chimney flashing and masonry
Older NJ homes have brick chimneys with flashing that was tarred over instead of cut into the mortar joints. As the tar cracks, water runs behind it. Wide chimneys also typically need a cricket, a small peaked diverter on the uphill side, so water does not pool behind them. Cracked crowns and porous brick add water that is easy to mistake for a roof leak.
Skylight seals and curb flashing
Skylights leak at the flashing kit around the curb, at a failed glass seal or from condensation on the inside of the glass. Many older units were installed with caulk and surface-mounted flashing in place of a proper kit. A skylight under a valley or below a long run of roof takes extra water and fails sooner.
Valleys that carry too much water
A valley is where two roof slopes meet, and it carries the runoff from both. Worn shingles in a closed-cut valley, nails driven too close to the center, or debris and ice packing the valley all push water sideways under the shingles. Valleys over a garage-to-house tie-in are a common NJ trouble spot.
Ice dams in northern and western NJ
Heat from the house melts snow on the upper roof. The meltwater refreezes at the cold eaves and forms a ridge of ice that backs water up under the shingles. Homes in Sussex, Warren, Morris, Passaic and Hunterdon counties see this most, especially older houses with little attic insulation and no ice barrier at the eaves.
Wind-driven rain from nor’easters and tropical storms
From October through April, nor’easters push rain sideways for hours, and June through November brings tropical remnants. That water gets under ridge vents, lifted shingle tabs, loose drip edge and siding joints that stay dry in normal rain. Shore homes in Monmouth, Ocean, Atlantic and Cape May counties take the most wind, and salt air shortens fastener and flashing life.
Nail pops, exposed fasteners and old repairs
When a roof deck expands and contracts through NJ seasons, nails can back out and push up the shingle above. Water then runs down the nail shank. Exposed nails on ridge caps, flashing and past patches, plus roofing cement that has dried and cracked, are a steady source of small leaks that get blamed on the whole roof.
How we do it
How Does Roof Repair SNJ Find and Fix a Roof Leak?
We work from the inside out: map the stain, trace the water in the attic, inspect every detail uphill of it on the roof, test if needed, then repair the actual entry point and confirm it holds. You get photos of what we found and a written itemized quote before we start any repair.
1. Triage your request and protect the inside
When you send a request through our contact page, tell us where the water shows up, what the weather was doing and how old the roof is. That narrows the likely sources before we arrive. If water is actively coming in, we point you to the first-hour steps on this page and, for after-hours tarping, route you to our emergency roof repair team.
2. Map the interior damage
We start in the room where you see water. We photograph the stain, check how far it has spread with our hands and eyes, look at nearby walls, fixtures and closets, and note the room’s position under the roof. That interior map tells us which roof plane and which details sit uphill of the damage.
3. Trace the leak path in the attic
If there is attic access, we go up with a light and follow the water trail uphill: stains on the deck, wet or matted insulation, drip marks on rafters, rusty nails and wet spots on pipes and ducts. Water often travels along a rafter or the top of a ceiling joist before it drops, so the trail usually ends well away from the ceiling stain.
4. Inspect every detail uphill on the roof
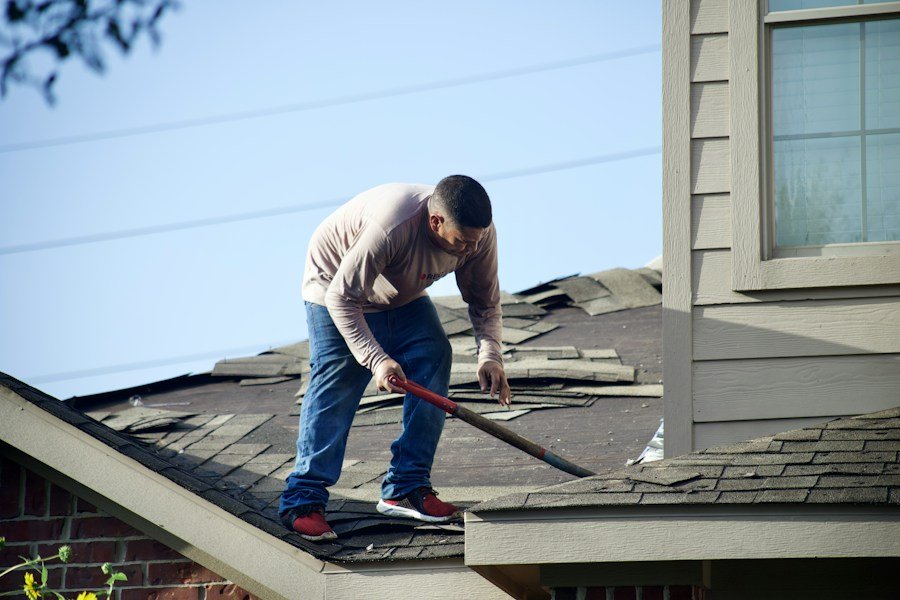
On the roof, we check each detail above the suspected path: pipe boots, step and counter flashing, chimney flashing and cricket, skylight curb, valleys, ridge vent, drip edge and fasteners. We look for cracked rubber, lifted shingles, face-nailed flashing, dried-out cement and nail pops, and we photograph each suspect so you can see it.
5. Water-test when the source is hidden
If the attic and roof do not show a clear source, we use a controlled hose test. One person runs water low on the roof while another watches inside, and we move up one detail at a time, waiting several minutes at each step. Isolating each area keeps us from guessing. On some flat and low-slope roofs, moisture readings or an infrared survey can map wet insulation.
6. Repair or re-flash the entry point
With the source confirmed, we quote the fix in writing and do the work: replace a pipe boot, re-flash a chimney or sidewall, install a new skylight flashing kit, rebuild a valley, reseat fasteners or replace damaged shingles and underlayment. If the deck under it is soft, we show you and price that separately before cutting it out.
7. Test, clean up and document
After the repair, we water-test the area again when practical, check the attic for new moisture, and clean up nails and debris from the roof, gutters and yard. You get photos of the source before and after, a written description of what we fixed, and notes on any other details that may need attention later.
Pricing · updated November 2026
How Much Does Roof Leak Repair Cost in NJ?
As of November 2026, most single-source roof leak repairs in New Jersey fall between about $400 and $1,500, with a pipe boot replacement often $250 to $600 and chimney re-flashing about $600 to $1,800. The price depends on what is leaking, how steep and high the roof is, and whether the deck underneath is damaged.
Pipe boot or vent flashing
$250 – $600
Removing shingles around one plumbing vent, installing a new boot or lead/metal vent flashing, re-shingling and sealing. Typical NJ range for one penetration on a walkable asphalt roof with the deck in good condition.
Single-source leak repair
$400 – $1,500
Tracing the leak, then fixing one confirmed entry point such as a nail-pop area, a short run of step flashing, a ridge vent section or a small shingle and underlayment repair. Most common leak repairs land here.
Skylight re-flashing
$400 – $1,200
Removing shingles around the curb, installing a new flashing kit and underlayment collar, and re-shingling. Replacing the skylight unit itself, or reframing the opening, costs more and is quoted separately.
Valley repair
$500 – $1,500
Opening the valley, replacing damaged underlayment with ice and water membrane, and re-laying the valley as closed-cut shingle or open metal. Length of valley, pitch and number of layers drive where in the range it falls.
Chimney re-flashing
$600 – $1,800
Removing old tar and flashing, installing new step flashing, cutting a reglet into the mortar joints for counter flashing, and adding or rebuilding a cricket where needed. Masonry repointing or crown repair is separate.
Deck rot found during repair
$500 – $2,000+
Cutting out and replacing soft plywood or plank sheathing found under the leak, plus the roofing over it. Replacing sheathing requires a permit in NJ, so we tell you before the work and price it on its own line.
What moves the price
- Leak source. A single pipe boot is quick. Chimneys, valleys and dormer sidewalls involve more flashing, more shingle removal and more careful sealing, so they cost more.
- How long it has leaked. A new leak usually means only roofing work. A leak that has run for months often means wet underlayment, soft deck boards and interior damage that add to the bill.
- Roof pitch and height. Steep roofs over about 8/12 and three-story homes need roof jacks, harnesses and more time. Walkable one-story ranches are the lowest cost to reach.
- Roofing material. Asphalt is the least expensive to open and close. Slate, cedar, tile and standing-seam metal need specialized materials and slower work, which raises the price.
- Number of layers. Two layers of shingles make flashing work harder because both have to be opened and sealed correctly at the detail.
- Matching and availability. Discontinued shingle colors or old slate sizes can take time to source. Close matches are usually possible; exact matches are not always.
- Access and timing. Tight lots, landscaping, solar panels near the leak or a request for after-hours work can add labor. Planned daytime repairs cost less than emergency visits.
- Permit-triggering work. Most leak repairs need no permit. Sheathing replacement, rafter repair or work on an attached townhome does, and permit fees and inspection time get added.
Prices are typical NJ planning ranges as of November 2026, not quotes. They reflect the repair ranges Roof Repair SNJ uses site-wide for New Jersey residential work. Your actual price comes from a free inspection and a written itemized quote. For full replacement pricing, see our roof leak repair cost guide.
Methods & materials
Roof Leak Repair Methods, Materials and Options for NJ Homes
A lasting roof leak repair finds the entry point first, then replaces the failed component with proper flashing and underlayment instead of covering it with caulk. The tabs below explain how leaks are traced, how each type is repaired, when a new flashing kit makes sense, and when a leaking roof is better replaced.
The stain on your ceiling is almost never directly under the hole in your roof. Water enters at a flashing joint or nail hole, then runs downhill along the top of the roof deck, the underside of the deck, a rafter, the top of a ceiling joist, a vapor barrier or a plumbing pipe. It drops only when it hits an obstacle or a low point. The entry point is often several feet uphill of the stain, and sometimes on a different roof plane.
That is why we trace instead of guessing. The usual sequence:
- Interior map. Where the stain is, what is above it, and which walls or fixtures are wet.
- Attic tracing. With a strong light, we follow water marks on the underside of the deck, rafters, insulation and pipes back uphill. Shiny or dark wood, rusted nail tips and compressed insulation show the trail. On a dry day, old stains with crisp edges show past water; soft edges or damp wood show recent water.
- Roof inspection uphill of the trail. Every penetration, flashing joint and fastener above the attic trail gets checked and photographed.
- Controlled water testing. When the source is still hidden, we run a hose low on the roof first, then move uphill one detail at a time while someone watches inside. Starting high would wet everything below and hide the answer.
Moisture meters and infrared cameras. A moisture meter can confirm wet drywall, framing or insulation, which helps show how far damage has spread. Infrared cameras detect temperature differences. The ASTM C1153 standard describes using infrared imaging at night to locate wet insulation in roofing systems, and it states that the method does not determine the cause of moisture or its point of entry. In practice, infrared helps map wet areas on flat and low-slope roofs, and the actual entry point still has to be confirmed by hand.
Finished ceilings, cathedral ceilings and flat roofs with no attic take longer to trace because there is no attic to walk. On those, we rely more on the roof inspection, water testing and, where needed, a small inspection opening that we discuss with you first.
Good leak repair means removing and replacing the failed part, then lapping new materials so water runs over them, the way it would on a new roof. Roofing cement and caulk have a place as a secondary seal, and they fail quickly as a primary fix in NJ freeze-thaw cycles.
The three levels of repair we choose between:
- Repair in place. Reseating or replacing a few fasteners, replacing cracked shingles, sealing an exposed nail head on a ridge cap, or re-bending and re-securing a flashing piece that has lifted. This works when the flashing itself is sound and the problem is a fastener or a single shingle.
- Re-flashing. Removing the shingles around a chimney, sidewall, dormer or skylight, taking out old flashing and tar, adding ice and water membrane behind the detail, and installing new step flashing, counter flashing or apron flashing. This is the fix for most chimney and wall leaks.
- New component. Replacing a cracked pipe boot, a failed ridge vent, a worn skylight flashing kit or a valley. New parts are matched to the roof’s material and pitch.
Repairs by source:
- Pipe boots: new boot slid over the pipe, top edge tucked under the shingles above, bottom edge over the shingles below, and the nails covered by the next course.
- Step flashing: one piece per shingle course, each overlapping the one below, nailed only to the deck and never to the wall.
- Chimneys: step flashing on the sides, counter flashing set into a cut reglet in the mortar, an apron on the downhill face and a cricket uphill when the chimney is wide.
- Valleys: ice and water membrane down the full length, then closed-cut shingles or open metal.
- Nail pops: pull the nail, fasten next to it into solid deck, seal the old hole and replace the shingle if it was damaged.
For shingle-specific repair detail, see our shingle roof repair page. Slate leaks need copper or stainless nail hooks and matched slate, covered on our slate roof repair page.
Installing new flashing or a new boot is the right call when the old piece is cracked, rusted, too short, face-nailed or buried in tar. Patching over a failed flashing usually buys one season. A properly installed new piece usually lasts as long as the roof around it.
Pipe boot installation. We remove the shingles above the vent, cut out the old boot, slide the new one over the pipe and set it on the deck. The upper flange goes under the shingles above it, and the lower flange lies on top of the shingles below so water sheds over it. Fasteners go where the next shingle course covers them. For homes where boots keep cracking, a lead or metal boot, or a boot with a replaceable collar, is a longer-lasting option.
Step and counter flashing installation. Each shingle course at a wall gets its own step flashing piece, bent to run several inches up the wall and several inches onto the roof per the shingle maker’s instructions, overlapping the piece below. The house wrap and siding lap over the vertical leg. On brick, counter flashing is set into a groove ground into the mortar, then sealed. At the bottom of a sidewall, a kick-out flashing turns water into the gutter so it does not run down the wall. Missing kick-outs cause many of the wall rot problems we find under dormers and garage tie-ins.
Skylight flashing kits. Most skylight manufacturers sell flashing kits sized to their units and to the roofing material. We remove the shingles around the curb, wrap the curb with an underlayment collar, then install the kit’s sill, step and head pieces in order. If the skylight is old, fogged or cracked, it is usually smarter to replace the unit and kit together while the roof is open.
Ridge vent and drip edge. Ridge vents that let in wind-driven rain are replaced with a baffled vent rated for the roof. Missing or short drip edge at the eaves and rakes is added so water drips into the gutter instead of wicking back under the shingles and onto the fascia.
Ice and water membrane. Behind every detail we re-flash, we add a self-adhering ice and water membrane as a second line of defense. That membrane is the same material code calls for at the eaves in ice-dam areas.
A temporary fix stops water today; a permanent fix replaces the failed part so it stops water for years. Both have a place. The mistake is leaving a temporary fix on through a New Jersey winter and calling it done.
Temporary measures are for active leaks, storms or a roof that cannot be safely worked on yet:
- Tarping. A heavy tarp run over the ridge and fastened with wood strips covers a large area. It is the standard storm response. For after-hours tarping, see our emergency roof repair service.
- Roofing cement or sealant on a small crack or nail head. This can hold for weeks or months. Heat, cold and UV break it down.
- Peel-and-stick patches or flashing tape over a cracked boot collar or split flashing. These can bridge until the part is replaced.
- Interior control. Buckets, plastic sheeting and a small hole poked at the low point of a bulging ceiling to drain trapped water in a controlled way.
Permanent repairs remove the failed part and install new flashing, boots, shingles or underlayment, lapped correctly. They need dry weather and safe roof conditions. Ice and water membrane needs a dry, reasonably warm deck to bond, so in deep winter we may tarp or patch first and come back on a mild day.
How to tell a temporary fix is on your roof now: globs of black cement around a chimney or vent, caulk beads along a wall line, a shiny aluminum tape patch, or shingles held down with exposed nails. These are often from a previous repair and are common leak sources themselves. We remove them during a permanent repair because cement trapped under new flashing can hold water against the deck.
One rule we follow: we tell you in writing whether what we did is temporary or permanent. If it is temporary, the quote says so and lists the permanent fix with its price.
Repair a leak when the roof is in fair shape and the problem is one or two details; consider replacement when leaks keep moving, the shingles are near end of life, or the deck is soft in several places. Most leaks we trace come from a flashing or penetration on a roof that still has years left, and fixing that one spot is the right answer.
Repair usually makes sense when:
- The leak traces to one source, such as a boot, a chimney or a sidewall.
- The shingles still lie flat, hold granules and bend without cracking.
- The deck is solid when walked and from the attic side.
- The roof is under about two-thirds of its expected life.
Replacement deserves a look when:
- You have had leaks at different spots in the last few years.
- Shingles are curling, cracked, missing in many places or bare of granules across whole slopes.
- There are already two layers, so any major repair is fighting both.
- The attic shows widespread staining, soft deck or poor ventilation that keeps causing moisture.
- Ice dams have pushed water in along the full eave because there is no ice barrier, and the fix means opening the bottom courses anyway.
Cost comparison. A single NJ leak repair typically runs about $400 to $1,500. Fixr puts typical New Jersey roof replacement at about $8,500 to $17,000, with an average near $13,500 for about 1,700 square feet. If repeated repairs on an aging roof are approaching a meaningful fraction of that, a replacement often costs less over the next ten years. A third layer of roofing is not allowed by code, so a two-layer roof that needs replacement means a full tear-off.
We will tell you plainly which side your roof is on, with photos. If you want a second look at the whole roof before deciding, our roof inspection service covers every slope, the attic and ventilation. Replacement details are on our roof replacement page.
For NJ leak repairs, the key materials are a self-adhering ice and water membrane, corrosion-resistant flashing metal, durable pipe boots and shingles matched to the existing roof. The right choice depends on where you live in the state and what the rest of the roof is made of.
- Ice and water membrane. A rubberized asphalt sheet that sticks to the deck and seals around nails. The International Residential Code calls for an ice barrier in areas with a history of ice forming at the eaves, extending from the eave edge to at least 24 inches inside the exterior wall line, made of a self-adhering polymer-modified bitumen sheet or two layers of underlayment cemented together. We also use it in valleys and behind re-flashed chimneys and walls.
- Flashing metal. Pre-finished aluminum and galvanized steel are common on asphalt roofs. Copper is the standard on slate and on many older NJ homes because it outlasts the roof. Near the shore, salt air corrodes galvanized steel faster, so we lean toward aluminum, copper or stainless fasteners in Monmouth, Ocean, Atlantic and Cape May counties. Dissimilar metals that touch, such as copper and aluminum, corrode each other and need to be kept apart.
- Pipe boots. Standard rubber-collar boots are fine where they get replaced on schedule. Lead boots, boots with replaceable collars or all-metal boots last longer under NJ sun and cold.
- Shingles. We match manufacturer, line and color as closely as possible. Architectural shingles are the most common on NJ homes. Older 3-tab roofs are harder to match exactly.
- Sealants. A quality polyurethane or butyl sealant at counter flashing reglets and exposed fastener heads, used as a secondary seal, never as the only seal.
- Low-slope materials. EPDM, TPO and modified bitumen need their own primers, seam tapes and patches; mixing systems causes leaks. Our flat roof repair page covers those.
In NJ’s humid summers, attic ventilation matters as much as roofing. Balanced intake at the soffits and exhaust at the ridge keeps condensation and ice dams down, which cuts the number of leak reports that turn out not to be roof leaks at all.
NJ rules
Do You Need a Permit or Insurance Claim for Roof Leak Repair in NJ?
Permits
Most roof leak repairs on a detached one- or two-family home in New Jersey need no permit. Since March 5, 2018, repairing or replacing existing roof covering on those homes is ordinary maintenance under N.J.A.C. 5:23-2.7, so replacing a pipe boot, re-flashing a chimney, swapping shingles or rebuilding a valley requires no permit, inspection or notice to the town. A permit is needed when the leak repair turns into:
- Replacing roof sheathing or deck boards that rotted from a long-term leak.
- Repairing or sistering rafters or trusses, or cutting framing for a larger skylight.
- Any structural work.
- Work on a building that is not a detached one- or two-family dwelling, such as a townhome, condo, larger multi-family or commercial building.
- Adding a third layer of roofing.
Ordinary maintenance still has to meet code. If we find rotted deck under a leak, we stop, show you, and handle the permit before replacing it.
Insurance
Homeowners insurance usually covers leaks caused by a sudden event, such as wind lifting shingles, a falling tree, hail or the weight of ice and snow, and usually excludes leaks from wear, age or neglect. A cracked pipe boot or a chimney flashing that failed slowly is typically a maintenance repair. Interior damage from a sudden event may be covered even when the roof repair is not, depending on your policy. Coastal policies often carry a separate wind or hurricane deductible. Your policy and agent have the final word.
To document a leak:
- Photograph the ceiling, walls, attic and anything damaged, with dates.
- Note when the leak started and the weather that day.
- Keep receipts for tarping, drying and any emergency repair. Most policies expect reasonable steps to prevent further damage.
- Keep our inspection photos and written findings.
For storm claims and adjuster meetings, see our storm damage roof repair page.
Who does the work
Why NJ Homeowners Choose Roof Repair SNJ for Roof Leak Repair
- Repairing NJ roofs for 25+ years
- General liability + workers’ comp insurance
- Workmanship warranty: 2 years on repairs, 10 years on full replacements, in writing
Check any NJ roofer before you sign
Ask for the 13VH registration number and confirm it on the NJ license lookup. NJ law requires a signed written contract showing the registration number and total price, and gives you until midnight of the third business day to cancel (N.J.S.A. 56:8-151).
In depth
Roof Leak Repair in NJ: Questions Most Roofers Do Not Answer
What should I do in the first hour of a roof leak?
Protect people first, then control the water inside, then document, and leave the roof itself for when it is safe. Here is the order we give homeowners who reach out with an active leak:
- Check for electrical risk. If water is near a light fixture, ceiling fan, outlet or the electric panel, turn off that circuit at the breaker. If you cannot reach the panel safely, keep everyone out of the room.
- Catch the water. Put a bucket or trash can under the drip, with a towel in the bottom to stop splashing. Move furniture, rugs and electronics out, or cover them with plastic.
- Relieve a bulging ceiling. If the drywall sags with trapped water, set a bucket under the lowest point and poke a small hole with a screwdriver to let it drain. This keeps the water from spreading and can keep the whole panel from falling.
- Go into the attic if you can do so safely. Step only on joists. Put a bucket or a piece of plywood with a tarp under the drip. Look for where the water is running and take a photo.
- Document. Take photos and short videos of the ceiling, the attic and the outside of the roof from the ground. Note the time and the weather.
- Send your details. Tell us what you’re seeing and attach your photos. For a tarp at night or during a storm, our emergency roof repair team handles after-hours response.
- Start drying. Fans and a dehumidifier in the room start the clock on keeping mold from growing.
What not to do: do not climb onto a wet, icy or windy roof, and do not walk on a steep roof at all. Do not chip ice off an ice dam with a hammer or shovel; it tears shingles. Do not seal over the leak from inside the attic. Water trapped on the deck will rot it. Leave the outside work for a dry, safe day, or for a crew with fall protection.
Is it a roof leak, condensation or something else?
If water appears on cold, dry days, especially sunny winter mornings, and the attic has frost or wet nail tips across a large area, the problem is likely condensation, not a roof leak. Roughly speaking, a roof leak follows rain or melt; condensation follows cold.
How condensation happens: warm, moist air from showers, cooking, dryers and people rises into the attic through gaps around ceiling lights, attic hatches and bath fans that vent into the attic. When it hits a cold roof deck or nails, it freezes as frost. On the next sunny day it melts and drips onto insulation and ceilings. Many NJ homes from the 1950s through the 1980s have bath fans that dump into the attic and soffit vents painted over or blocked by insulation, which makes this common.
Quick ways to tell them apart:
- Timing. Leak: during or right after rain, wind-driven rain or snowmelt. Condensation: cold snaps, sunny mornings, no rain.
- Pattern. Leak: a trail to one spot. Condensation: frost or damp across many nails and the whole underside of the deck.
- Ice dams. Water at the eaves or exterior walls after snow is usually an ice dam, which is a leak caused by heat loss.
- Other sources. An upstairs bathroom, an AC air handler or drain line in the attic, a plumbing vent or a window can all leak water that looks like a roof leak. Water that shows up with no rain and no cold snap points here.
Fixing condensation means sealing air leaks into the attic, venting bath fans outside, and making sure soffit intake and ridge exhaust are clear and balanced. Re-roofing does not fix it. We check for condensation on every leak inspection so you do not pay for roof work that would not stop the water.
How fast does a roof leak cause mold and interior damage?
The EPA says that drying water-damaged areas and items within 24 to 48 hours will, in most cases, prevent mold from growing. That window is the reason we push homeowners to start drying the same day, even before the roof is repaired.
What happens to each material:
- Drywall ceilings. A single wetting usually leaves a stain that can be sealed and painted once dry. Repeated wetting softens the gypsum, makes the paper face grow mold and can make the panel sag or fall.
- Insulation. Wet fiberglass loses much of its insulating value while wet and can compress permanently. Wet cellulose mats down and holds water against the ceiling. Soaked insulation over a stain usually needs replacing.
- Roof deck and framing. Plywood and OSB can delaminate or soften when wet repeatedly. Older plank sheathing holds up better but still rots at nail holes and edges.
- Walls. Leaks at sidewalls and chimneys often run inside the wall cavity, where you cannot see them for months. Bubbling paint or a soft baseboard is often the first sign.
For cleanup, the EPA guide says homeowners can usually handle a moldy area under about 10 square feet themselves, and that larger areas or significant water damage call for following EPA’s guidance for larger remediation. See the EPA mold and moisture guide.
Our part is stopping the water and showing you where it went. We point out wet insulation, stained deck and soft spots in the attic, and we recommend a water mitigation or drywall contractor when the interior damage goes beyond what fans and a dehumidifier can handle.
Can I fix a roof leak myself, or do I need a pro?
A homeowner can safely catch water, document the leak, check the attic, clean gutters on a one-story home and, on a low walkable roof in dry weather, put sealant on an exposed nail head. Tracing a hidden leak, re-flashing and anything on a steep or two-story roof is professional work.
Reasonable DIY steps:
- Look in the attic with a flashlight after rain and photograph the water trail.
- Check from the ground with binoculars for cracked boots, lifted shingles and nail pops.
- Clear leaves from gutters and downspouts on a single-story home, using a stable ladder.
- Replace a bath fan duct that dumps into the attic, if you are comfortable in attics.
Where DIY usually goes wrong:
- Caulk on everything. Sealant smeared across flashing joints traps water and often blocks the paths water was meant to drain through. It also makes the real repair harder.
- Fixing the wrong spot. Patching above the ceiling stain misses the true entry point uphill.
- Nailing through flashing. Exposed nails in flashing create new holes.
- Walking on the roof. Falls from roofs and ladders are a serious injury risk. Wet shingles, moss, frost and steep pitches make it worse. Slate and tile also break underfoot.
- Voiding a warranty. Some shingle warranties require repairs to follow the manufacturer’s instructions. A homeowner patch that does not can complicate a later claim.
A controlled hose test can also be done by a homeowner on a low roof, but only with a helper inside and only working from low to high. If you try it and still cannot find the source, that is the point to book a professional leak trace. An inspection with photos is free with us.
When do NJ roof leaks happen most, and when is the best time to fix them?
NJ roof leaks spike during fall and winter nor’easters, January and February thaws after snow, and late-summer tropical storms; the best time for a permanent repair is a dry day above about 40 degrees, which in New Jersey covers most of the year.
How the seasons play out across the state:
- October through April: nor’easters. Long periods of wind-driven rain find every weak sidewall flashing, ridge vent and lifted shingle. Leaks that show up only on these days are usually on the windward side.
- December through March: ice dams and freeze-thaw. Worst in Sussex, Warren, Morris, Passaic and Hunterdon counties, where snow stays on roofs longer. Freeze-thaw also opens cracks in old roofing cement and pushes nails up.
- Spring: storm aftermath. Damage that happened in winter shows itself in heavy spring rain. Spring is a good time for an inspection.
- Summer: heat and humidity. Hot roofs dry out rubber pipe boots and sealants. Afternoon thunderstorms bring short, heavy downpours that overload valleys and gutters.
- June through November: tropical systems. Remnants of hurricanes and tropical storms bring sustained wind and inches of rain. Shore counties take the most wind.
Timing a repair: active leaks get temporary protection right away. Permanent work needs a dry roof. Ice and water membrane and shingle sealant strips bond best in moderate temperatures. In a cold snap, we may install a permanent flashing repair and hand-seal the shingles, or tarp first and finish on the next mild day. We tell you which one we did.
Fall is the smart time to fix a known slow leak, before nor’easter season and the first snow. A small boot or flashing leak fixed in October is a one-visit job. The same leak after a winter of ice dams can mean deck repair.
How long does a roof leak repair last, and what about warranties?
A properly done flashing or boot replacement typically lasts as long as the roofing around it; a caulk or cement patch may last only a season or two. How long a repair lasts depends on what was replaced and the condition of the roof it ties into.
Typical expectations:
- New pipe boot. Rubber-collar boots wear out with sun and cold and may need replacing again before the roof does. Metal and lead boots last much longer.
- Re-flashed chimney or wall. New metal flashing with a counter flashing set into the mortar lasts for decades if the masonry stays sound.
- Rebuilt valley. Lasts as long as the shingles on the slopes beside it.
- Sealant patch. A stopgap. Expect to replace it.
Warranty questions to ask:
- Workmanship warranty. This covers the repair labor. Ask how long it lasts, exactly what it covers, and get it in writing. A repair on a near-end-of-life roof will usually carry a shorter or more limited warranty, because leaks elsewhere on the roof are not caused by the repair.
- Manufacturer warranty. If your roof is still under a shingle manufacturer’s warranty, repairs should follow that manufacturer’s instructions and use compatible materials. Ask the roofer to confirm and keep the paperwork.
- Previous installer’s warranty. If your roof is newer and under an installer’s workmanship warranty, call that installer first. Another contractor’s repair can affect that coverage.
Our written quote states what we are repairing and whether the fix is temporary or permanent, so you know what the work is meant to do. For warranty terms specific to your job, ask us at inspection and get the answer in writing.
How are flat and commercial roof leaks different?
Leaks on flat and low-slope roofs are harder to trace because water can travel far under the membrane or through wet insulation before it drips, and the fixes depend on the membrane type. Sloped roofs shed water fast; flat roofs hold it, so any seam or penetration flaw stays wet longer.
Common flat-roof leak sources in NJ:
- Seams. TPO and PVC seams are heat-welded; EPDM seams are glued or taped. Failed or poorly welded seams open with heat and cold.
- Penetrations. HVAC curbs, pipes, conduits and roof drains. Pitch pans filled with old sealant are a frequent problem.
- Perimeter and parapet. Coping, the metal cap on a parapet wall, and the membrane flashing up the wall. Water gets in at coping joints and behind loose wall flashing.
- Ponding. Water that stands more than a couple of days after rain ages the membrane faster and finds every small defect. Clogged drains and scuppers, the openings in a parapet that let water out, cause much of it.
- Rowhouse and porch roofs. Older NJ cities like Newark, Jersey City, Hoboken, Paterson and Trenton have many flat-roofed rowhouses and porch roofs with layered coatings and patches.
Detection on flat roofs relies more on a visual seam-by-seam inspection, probing seams, flood or hose testing of specific areas, and, for larger roofs, moisture surveys such as infrared scanning to map wet insulation that needs replacing. Wet insulation under a membrane stays wet, so finding and removing it is part of a lasting repair.
Commercial and multi-family buildings also differ on rules. Roof work on them is outside the one- and two-family ordinary maintenance exemption, so permits are usually part of the job. For more, see our flat roof repair and commercial roofing pages.
How do I choose a roof leak repair contractor in NJ?
Choose a registered NJ contractor who will trace the leak, show you photos of the actual source, and put the repair in a written, itemized contract. Leak repair is diagnostic work; a contractor who quotes a fix over the phone without looking is guessing.
Checks every NJ homeowner can do:
- Registration. New Jersey home improvement contractors must register with the Division of Consumer Affairs and have a number beginning with 13VH. Registration requires at least $500,000 of commercial general liability insurance. Look it up at newjersey.mylicense.com.
- Written contract. Under the Contractors’ Registration Act, N.J.S.A. 56:8-151, home improvement contracts must be in writing and signed, list the contractor’s legal name, address and registration number, state the total price, include a copy of the liability insurance certificate, and include a Notice to Consumer of your right to cancel before midnight of the third business day after you receive a copy.
- Insurance certificate. Ask for it and check the dates.
Questions specific to leak repair:
- How will you find the source? Will you go in the attic?
- Will you show me photos of the entry point before and after?
- Is this repair temporary or permanent?
- Will you replace the flashing or boot, or seal over it?
- If you find rotted deck, how will you tell me and how is it priced?
- What happens if it leaks again in the same spot?
Red flags: a full-roof replacement pitch before anyone has looked in the attic, cash-only demands, pressure to sign the same day, and quotes that say only “fix leak” with no description of the work. Our process gives you photos, a written itemized quote and a clear statement of what we will repair. You can ask for a written leak repair quote any time.
Service areas
Roof Leak Repair Across New Jersey
We provide roof leak repair in all 21 New Jersey counties. Find your county and town on our New Jersey service locations page for local roof types, permit notes and prices.
FAQ
Roof Leak Repair in NJ: Frequently Asked Questions
How much does roof leak repair cost in NJ?
Most single-source roof leak repairs in New Jersey cost about $400 to $1,500 as of November 2026. A pipe boot is often $250 to $600, skylight re-flashing $400 to $1,200 and chimney re-flashing $600 to $1,800. Rotted deck adds cost. These are planning ranges; a free inspection gives you an itemized quote.
Why is my ceiling stain not under the roof leak?
Water enters at a flashing or nail hole, then runs downhill along the roof deck, rafters, ceiling joists or pipes until it finds a low point to drip. The stain marks where it dropped, which is often several feet below the entry point and sometimes on another part of the roof. Tracing it in the attic finds the source.
Do I need a permit to repair a roof leak in New Jersey?
Usually not. Repairing roof covering on a detached one- or two-family home is ordinary maintenance under N.J.A.C. 5:23-2.7, with no permit needed. A permit is required if the repair includes replacing roof sheathing, rafter work, other structural work, a townhome or commercial building, or a third roof layer.
Does homeowners insurance cover a leaking roof in NJ?
Insurance usually covers leaks from a sudden event such as wind damage, a fallen tree, hail or the weight of ice and snow. It usually excludes leaks from age, wear or neglect, like a pipe boot that cracked over years. Interior damage may be covered differently. Your policy and agent decide, so document everything with photos.
How fast should I fix a roof leak?
Control the water and start drying the same day. The EPA says drying wet materials within 24 to 48 hours usually prevents mold. Get temporary protection on the roof right away if water is coming in, and a permanent repair as soon as the roof is dry and safe, ideally before the next storm.
Can a roof leak in winter be repaired?
Yes. Temporary measures like tarps or sealant patches can go on in almost any weather once the roof is safe to access. Permanent flashing and shingle work is done on a dry day, and adhesive membranes and shingle seal strips bond best in milder temperatures, so some winter repairs are finished in two visits.
What is the most common source of roof leaks in NJ?
Roof details cause most leaks: cracked rubber pipe boots, step flashing where a roof meets a wall or dormer, chimney flashing, skylights and valleys. In northern and western NJ, ice dams cause many winter leaks, and along the shore, wind-driven rain from nor’easters finds weak flashing and ridge vents.
Is my attic leak actually condensation?
It may be. Condensation shows up on cold, dry days, often sunny winter mornings, as frost or wet nail tips across much of the attic. A roof leak follows rain or snowmelt and leaves a trail to one spot. Bath fans venting into the attic and blocked soffit vents are frequent causes of condensation.
Should I repair a leak or replace my roof?
Repair when the leak traces to one or two details and the shingles and deck are in decent shape. Consider replacement when leaks keep appearing in different places, shingles are curling or bare, the deck is soft in several areas, or there are already two layers. Photos from an inspection help you decide.
How long does a roof leak repair take?
Most single-source leak repairs, such as a pipe boot, a short sidewall or a nail-pop area, take a few hours once the source is confirmed. Chimney re-flashing or a valley rebuild can take most of a day. Tracing a hidden leak, waiting for dry weather or replacing rotted deck can add time.
Reviewed by the Roof Repair SNJ team · Last updated November 2026
Roof repair
Related roof repair services
Roof Leak Repair is part of our roof repair services. See every service on our roof repair NJ homepage.
Free inspection
Get Your Roof Leak Traced and Fixed: Free Inspection in NJ
Tell us where the water shows up and when. We will trace it to the real entry point, photograph what we find and give you a written itemized quote before any work starts. Roof Repair SNJ serves all 21 New Jersey counties. Emergency requests for active leaks are handled day or night, or you can schedule your leak inspection online.
The inspection is free, and you decide what happens next.
No pressure and no obligation. If a repair will do, we’ll tell you.
Roof Repair SNJ
- Serving all 21 NJ counties
- Send a roof leak repair request
- Mon–Fri 5:00 AM–10:00 PM · Sat 5:00 AM–6:00 PM · Emergencies 24/7
Sources: N.J.A.C. 5:23-2.7, Ordinary maintenance (Cornell LII) · NJ Division of Consumer Affairs license and registration verification · N.J.S.A. 56:8-151, Contractors’ Registration Act contract requirements (Justia) · EPA, A Brief Guide to Mold, Moisture and Your Home · IRC 2021 R905.1.2 Ice barrier (paraphrased code summary) · ASTM C1153-23, Location of Wet Insulation in Roofing Systems Using Infrared Imaging · Fixr, Roof Replacement Cost in New Jersey (2026). Prices are planning ranges, not quotes. Permit and insurance information is general guidance; your town, policy and agent have the final word.